Introduction
EASYPLEX
App Documentation
Updated : 25/03/2024By : Y0bEX
Skype : Skype Support
Thank you!
for purchasing EasyPlex ! If you have any questions that are beyond the scope of this help file, please
feel free to contact us via Skype Support
(Do not forget to include your Purchase Code that you got from Envato when you
purchased this App).
Thanks so much!
App Links Assistant
Open the Constants file inside your project path is : com.easyplexdemoapp.util

change the domain to the one you will use
change the domain onlso inside the AndroidManiefest.xml , you can search this line
"<data android:host="yobdev.com" />"
Open Android Studio file -> Tools -> App Links Assistant

Enter your site domain with the correct package name and click Generate


A Json file will be created containing your sha256 key
To Complete associating your app with your website , save the json file to this localtion https://yourdomain.com/.well-known/assetlinks.json
Note ! in the json your have to enter the sha256 for your debug and release or your sharing links will fail to open
Gmail SMTP SETUP
To able to use the your gmail as your primary server for sending emails follow this seteps
Open the env file and edit the info
MAIL_DRIVER=smtp
MAIL_HOST=smtp.gmail.com
MAIL_PORT=587
MAIL_USERNAME= Your gmail adress
MAIL_PASSWORD= You need an App Password ( to create it visit the link bellow
MAIL_ENCRYPTION=tls
MAIL_FROM_NAME=EasyPlex
Using an smtp provider
Open the env file and edit the info
MAIL_DRIVER= use (smtp) in case you don't work for you switch to (sendmail)
MAIL_DRIVER=smtp or sendmail
MAIL_HOST= Your smtp host
MAIL_PORT=465
MAIL_USERNAME= Your email adress
MAIL_PASSWORD= You Password
MAIL_ENCRYPTION=tls
MAIL_FROM_NAME=EasyPlex
Customize Laravel Default Verification Email (Change The Header)
Open AuthServiceProvider.php path = App\Providers
APP SIGNATURE
Open your app setting from mobile app , navigate to Get App Signature

click to obtain the signature and open your env file from laravel files then paste the signature

Finaly activate the api check from env file ENABLE_API_CHECK to true
Note ! to obtain your release apk signature make sure to enable from constant file ENABLE_SIGNATURE_RELEASE to true , once you get the signature please turn if off !
For this installation your hosting must allow all the necessary extensions.
3 - Open the .env file and modify the corresponding environment variables: DB_DATABASE, DB_USERNAME, DB_PASSWORD DB_DATABASE = Your Database Name Created in PHPMYADMIN DB_USERNAME = Your DATABASE USERNAME Created in PHPMYADMIN DB_PASSWORD = Your DATABASE PASSWORD Created in PHPMYADMIN Open your phpmyadmin and select your database: On the import menu click choose file and select EasyPlexDatabase.sql: 8 - Open Your Localhost (http://localhost/public/) url in the browser 9 - Congratulations, you already have the admin panel installed in your
localhost. user: [email protected]
password: 123456 10 - After you loggin in the home page you must update the webpanel config
via Update Now 11 - After you the success message you must clear your browser and cloudflare cache 1 - Open Your Filemanager and upload EASYPLEX.zip in public_html 2 - exract the files in the desired destination 3 - Open the .env file and modify the corresponding environment variables: DB_DATABASE, DB_USERNAME, DB_PASSWORD DB_DATABASE = Your Database Name Created in PHPMYADMIN DB_USERNAME = Your DATABASE USERNAME Created in PHPMYADMIN DB_PASSWORD = Your DATABASE PASSWORD Created in PHPMYADMIN Open your phpmyadmin and select your database: On the import menu click choose file and select EasyPlexDatabase.sql: 7 - Open Your site in the browser 8 - Congratulations, you already have the admin panel installed in your
cpanel. user: [email protected]
password: 123456 10 - After you loggin in the home page you must update the webpanel config
via Update Now 11 - After you the success message you must clear your browser and cloudflare cache from 1.5 we added an Authorisation Header to secure more your api to use that follow the steps this is your Authorisation Bearer to access to your api inside the app without it all requests will be rejected
enter any words you like is prefered to use a string generator after that open https://www.base64encode.org/ Encrypt the key like ( Your Main Server Api) then paste it into the AUTHORISATION_BEARER value in Constants.java Now Open your .env file and edit the TOKEN value (Must be the same as your android value) for the token value in the .env use the real value not the encoded In case you want to work with that you can use the
Decrypter.php to able to use the Authorisation Header method You can find your Purchase code in the download section Go to Settings and Enter Your Purchase Code For this installation your must have android studio 4.0 or newer
1 - Unzip EasyPlex.zip inside Android Code 1 - Click on "Import Project (Gradle,Eclipse ADT, etc.)" and select EasyPlex
Folder 3 - Wait until Android Studio finish the build and run your the app in the
emulator or a live device Place the "google-services.json" inside the app folder (Check Firebase setup First) Go to the firebase console, and create a project Fill the Package Name (You should use the same package name as in your app)
save the file "google-services.json" and place it inside android studio the
app folder project Go to Firbase Project Settings and Cloud Messaging Get your server key and save it in the project settings Open Android Studio Go to App->src->main->java and right click on the main package and choose
refactor->rename And enter you desired package name Click on Refactor Open Notepad++ click on Find and move to the Find in Files Directory = your root project files Find What = com.easyplexdemoapp Replace With = your full package name ex : com.yourpack Finaly click on Replaces in Files button When notepadd++ finish move to your project files and rename the easyplexdemoapp to your pacakgename the default structure is : https://yourserver.com/public/api/ in case you changed the structure of your site the api will be
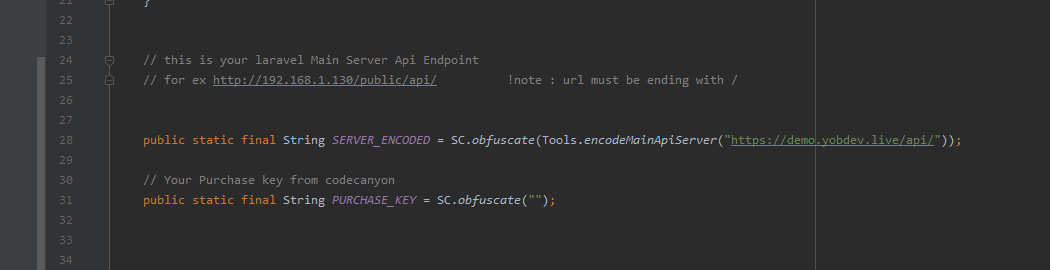
: https://yourserver.com/api/ 3 - Open Android Studio Navigate to this location App -> src -> main -> java -> yourpackagename -> util Open Constants.java and paste your encoded api like the picture in the SERVER_ENCODED value 4 - Now you need to enter your purchase code in the PURCHASE_KEY value 5 - Now you need to enter your API_KEY (Your random key to access to your api) in the API_KEY value this is just optional you can still work
without it just to secure more your api wich mean all calls
will be valid only if the real value passed in the url. Note ! you must enter the same key in the .env file in the API_KEY value Search Remote Config in your firebase Click create configuration click save and move to your android studio Constants.java file Turn to true the value FIREBASECONFIG Choose the value you entred inside your remote config inside SERVER_FIREBASE_VALUE restart your app and wait for the changes We already use the autoimport with ThemovieDB api, however this is configured
with a default API key that has limitations in use. To make sure you use a unique API key, you must register
an account at themoviedb.org, go to the settings and in the API tab request your API key and paste it in the
administration panel settings. Go to Settings and Enter TMDB API KEY You can change the covers path http://image.tmdb.org/t/p/original http://image.tmdb.org/t/p/w500 http://image.tmdb.org/t/p/w780 http://image.tmdb.org/t/p/w300 http://image.tmdb.org/t/p/w400 http://image.tmdb.org/t/p/w500 http://image.tmdb.org/t/p/w300 The cache is only working with php8 and must be the default in your server , you don't need to make changes to your Kernel.php file Cache is disabled by default to make it active change the value from env RESPONSE_CACHE_ENABLED to true You can control the cache time by default is 1h to edit this edit the value RESPONSE_CACHE_LIFETIME to your desired value ,
and need to enter the values in seconds RESPONSE_CACHE_LIFETIME=3600 = ( 1 Hour ) Recplace the Kernel.php from downlaoded files in this path location Download Kernel.php ( For PHP 7.4 or less )
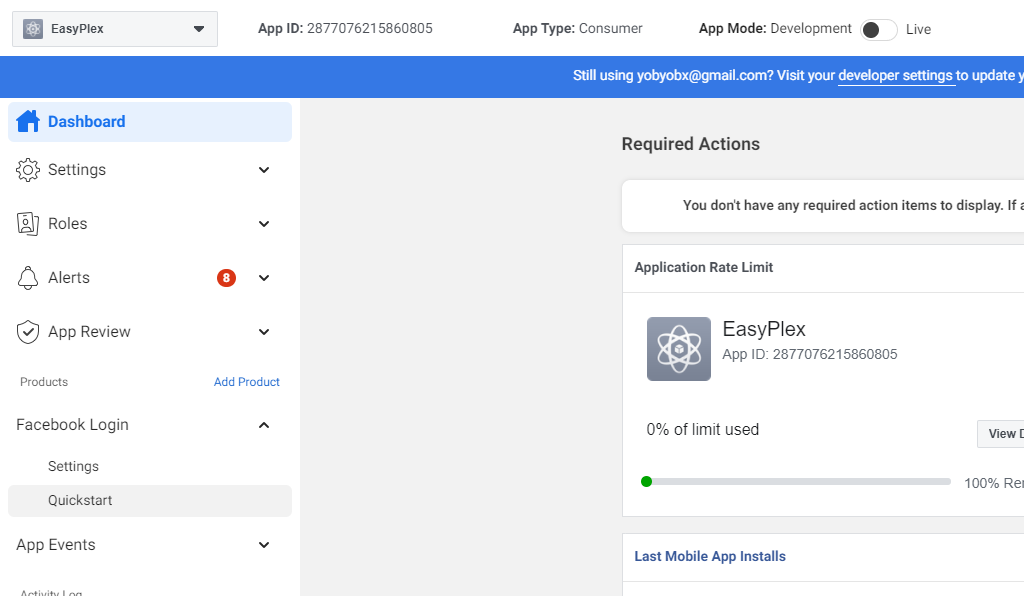
App\Http Open Android Studio >App> res > values > strings.xml Enter your app name inside "app_name" string tag: Enter a name and choose android as platform and click on Add Copy the App ID and save it on the panel (Laravel) Go To : Properties -> Create Property
Choose a Name
Choose Android as Platform
Choose a type Interstitial or Banner
Copy Your Placement ID and Save it in the panel
Before this step make sure you read (Check Firebase setup First) Step ! Fill The Title and the Content and press the Push Notification button Fill The Title and the Url Tag generated from google manager and press the
save button To Able to play a supported Host all you need use as the images bellow Note ! : Some hosts Require Header to work as Upload ( https://uqload.com ) Hosts Require Headers Doodstream - Yes Upload - Yes Vidmoly - Yes Zplayer - Yes Mp4upload - Yes Dailymotion - Yes filemoon - Yes voe - Yes streamwish - Yes Example Headers Doodstream = https://dood.wf/ Vidmoly = https://vidmoly.me/ Mp4upload = https://www.mp4upload.com/ voe.sx = https://voe.sx/ filemoon.sx = https://filemoon.sx/ embedwish.com = https://embedwish.com/ Doodstream = https://dood.wf/e/xxxxxxxxx voe = https://voe.sx/e/xxxxxxxxx FileMoon = https://filemoon.sx/e/xxxxxxxxx streamwish = https://embedwish.com/e/xxxxxxxxx
Open Your firebase Project
You need to add your sha1 for your keystore depend on what you are using
For debug keystore use this cmd to get it
For debug keystore use this cmd to get it
Search where is JAVA JDK is installed and open the path in cmd
for ex : cd C:\Program Files (x86)\Java\jdk1.8.0_66\bin
keytool -list -v -keystore "%USERPROFILE%\.android\debug.keystore" -alias androiddebugkey -storepass android -keypass android
Copy your sha1 and paste in your firebase project used inside your android app
For release keystore use this cmd to get it ( don't forget to change the path of your keystore in the cmd )
keytool -keystore C:\Users\ayoub\Documents\easyplex.jks -list -v
For release keystore use this cmd to get it ( don't forget to change the path of your keystore in the cmd )
keytool -keystore C:\Users\ayoub\Documents\easyplex.jks -list -v
Now move to Google Console Api
Visit : https://console.cloud.google.com/apis/credentials
Make sure to select your firebase project is important or you can't use login
Select the auto created client id
Copy the client id and the secrect and paste them in your env file
GOOGLE_CLIENT_ID= Your Client Id
GOOGLE_CLIENT_SECRET= Your Client Secret
GOOGLE_REDIRECT_URI= leave it empty
Copy the same client id olso in the Android Code in the Constant File
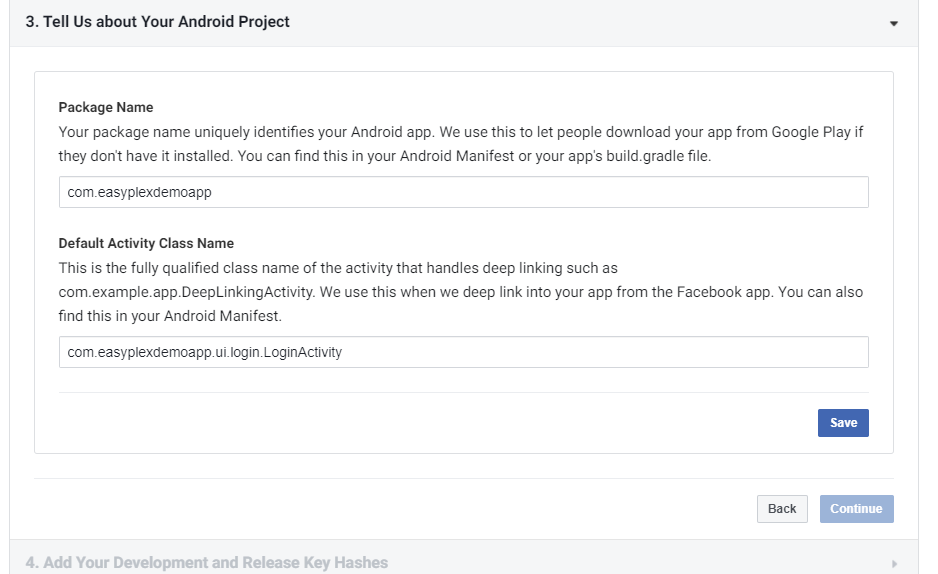
Open https://developers.facebook.com
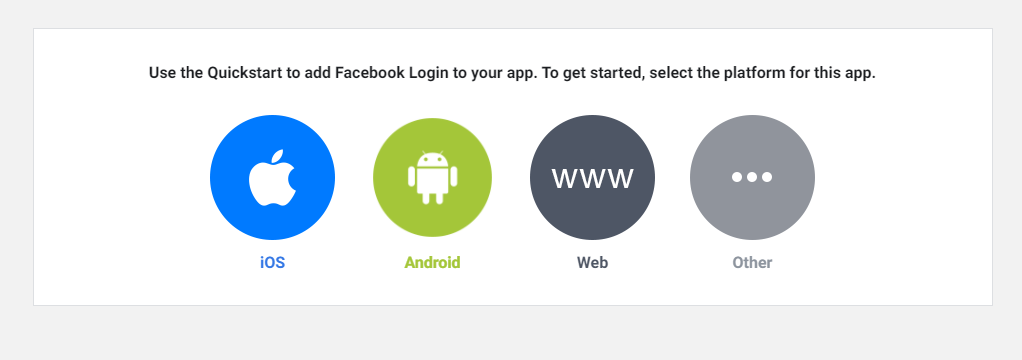
Create an app and navigate to QuickStart
Choose Android
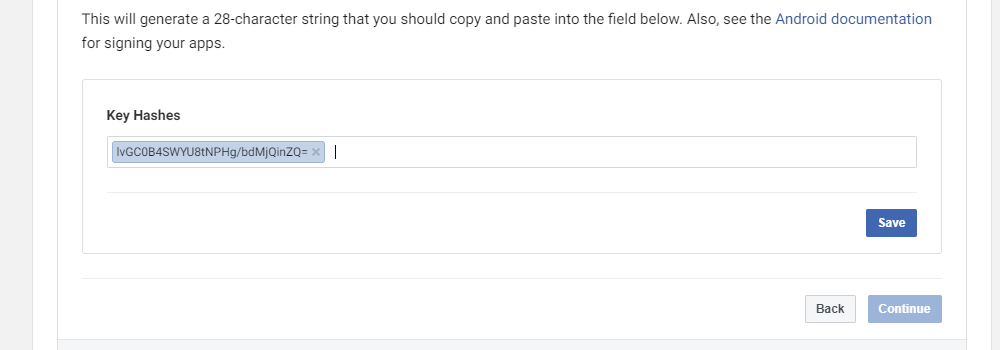
Enter your package name Extract the folder and add the path your windows environment After that navigate to where you installed JAVA JDK By default is on C:\Program Files (x86)\Java\jdk1.8.0_66\bin Open CMD and enter " cd C:\Program Files (x86)\Java\jdk1.8.0_66\bin " keytool -exportcert -alias androiddebugkey -keystore "C:\Users\your_user_name\.android\debug.keystore" | "PATH_TO_OPENSSL_LIBRARY\bin\openssl" sha1 -binary | "PATH_TO_OPENSSL_LIBRARY\bin\openssl" base64 keytool -exportcert -alias YOUR_RELEASE_KEY_ALIAS -keystore YOUR_RELEASE_KEY_PATH | openssl sha1 -binary | openssl base64 Copy the hash generated into the facebook Key Hashes page Open your /app/res/values/strings.xml file from Android Source Modify your AppID and protocol scheme generated from the facebook login page Move Now to the app setting in facebook devlopper and click basic
Copy the client id and the secrect and paste them in your env file
FACEBOOK_CLIENT_ID= Your App Id
FACEBOOK_CLIENT_SECRET= Your Client Secret
FACEBOOK_REDIRECT_URI= leave it empty
Click Monetization and navigate to Ad Units Click Add Ad Units Click Generate Token Copy the Token & App ID Navigate to your Ironsource Account and choose SDK Networks Enter the token & App Id from facebook the the input as the image Enter olso the placement id from facebook depend on your ads type (Banner - Interstitial - Rewards ) Go to : Paypal Devlopers
From the left sidebar choose : My Apps & Credentials and choose LIVE
Click Create and choose a name ex : EasyPlex Get your Client ID and save it on the panel section Payments
Title : Enter your plan Title Description : Enter your Plan Description Price : Enter your Plan Price Stripe Product Id & Stripe Price Id you need to get it from the products sections in stripe Go to Stripe and Products section and click on Add Product Enter you desired plan informations Click Save and go to that product info and copy the Stripe Product Id & Stripe Price Id for example Stripe Product Id : prod_I3KijqXWuE7 for example Stripe Price Id : price_1HTE2pGcvpoBS9mn and save in on the plan info with a duration days I've used folowing sources into this app: Once again, thank you so much for purchasing this app. As I said at the
beginning, I'd be glad to help you if you have any questions relating to this app. No guarantees, but I'll
do my best to assist. If you have a more general question relating to the apps on CodeCanyon, you might
consider visiting the "FAQ / Support" section and asking your question in the "Comments" section at
CodeCanyon app detail page.Deploy Laravel on Localhost


Deploy Laravel on Cpanel

Setup Bearer


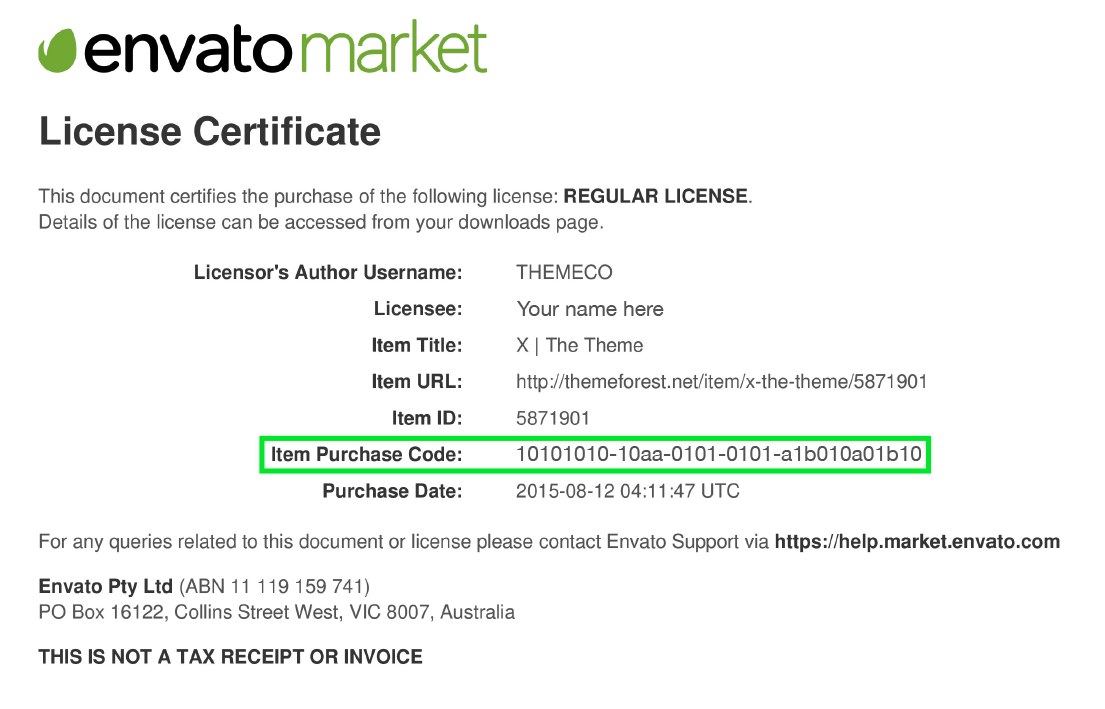
How to find my purchase code ?

Android Studio Import
Open Android Studio


Firebase Setup


Change The Package Name
1-First Method


2-Second Method ( Recommended )


Your Server Api

Firebase Remote Config Api


Setup ThemovieDB


Change Movies - TV Covers Path

Supported Url -( url must end without any slash ! )
Cache System
For PHP 8 Users
For 7.4 Users
Change App Name

Setup Admob


Create an AD Unit


Setup Facebook Audience


Send a Push Notifications

Add Ads

Supported Hots

Correct links format for supported hosts
Goolge & Facebook Login Setup


Facebook Login
For debug keystore
For Release keystore


Network Ads
Configure Unity Ads


Configure Facebook Bidding
With Ironsource


Paypal Api
Create An Paypal App Api


Stripe
Create An an Stripe Account and get your Api

save your api keys in the panel

Create a Plan


Third-party licenses
Support